In the previous blog I have shown you how to interface DS18B20 Temperature sensors with Raspberry Pi and post the sensor readings on ThingSpeak. This blog is similar to the previous one in terms of hardware requirements, but instead of storing the data on ThingSpeak here we will store the sensor readings in MySQL Database and display it on the web using PHP and Apache.
Outline
Overview
Raspberry Pi is a small programmable device capable of performing many computing tasks. It is mainly used in IOT applications which involves the use of sensors and other embedded devices that are connected to the internet to interact and exchange data with each other. In some IOT applications, the data generated needs to be stored for monitoring. One way to store data is by saving it in a database.
In this article, we will interface the DS18B20 sensor with Raspberry Pi to measure temperature and send the sensor readings (at some regular intervals) to a web server, which stores the readings in a MySQL database and displays it on the web using PHP.
What You'll Need
- Raspberry Pi
- SD Card
- DS18B20 temperature sensor
- Jumper wires
- 4.7 KΩ Resistor
- Breadboard
Interfacing DS18B20 Temperature Sensor with Raspberry Pi
The DS18B20 is a temperature sensor used to measure temperature. There are many variations of temperature sensors available; each differs in the purpose of measurement. The sensor used in this tutorial is a waterproof temperature sensor. It is mainly used to measure the temperature of liquids.
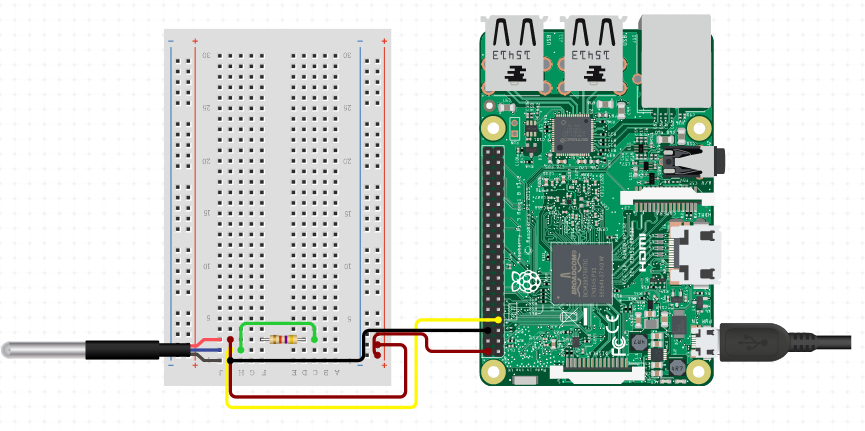
I have thoroughly discussed the circuit connections and configurations in detail here, so this is only the wiring diagram as a remainder.
Installing Apache, My SQL and PHP on Raspberry Pi
Before installing the above mentioned packages, ensure that you update and upgrade all the installed packages to their latest version.
Run the following command from the terminal to update and upgrade all the installed packages on your Raspberry Pi.
pi@raspberrypi:~ $ sudo apt update && sudo apt upgrade -y
Apache Web Server
Apache is an open-source web server software that delivers web pages through the internet. A web server is a software that processes client requests and serves web content via HTTP.
Run the following command from the terminal to install Apache2 on you Raspberry Pi.
pi@raspberrypi:~ $
sudo apt install apache2 -y
After successful installation, change directory location to "/var/www/html" and look for index.html file using "ls" command.
pi@raspberrypi:~ $ cd /var/www/html
pi@raspberrypi:/var/www/html $ ls -al
index.html
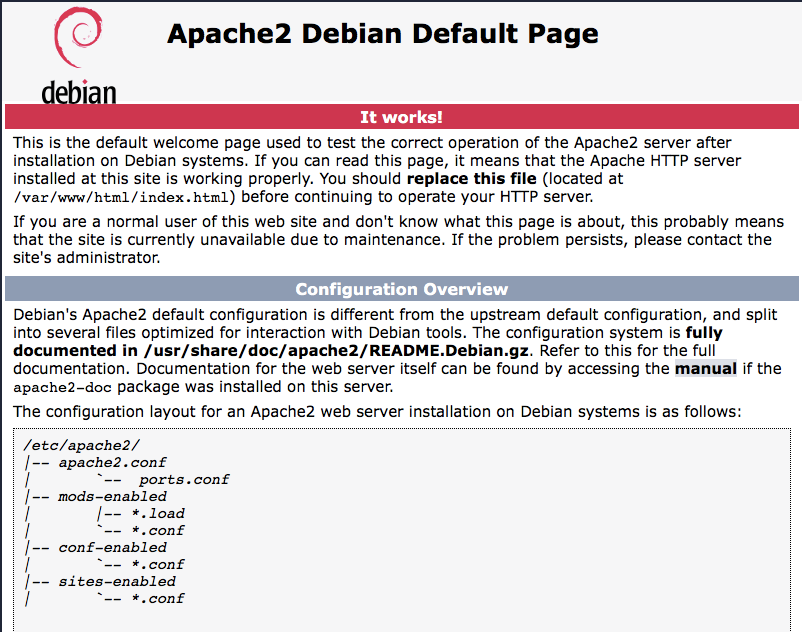
Run the following command from the terminal to know your Raspberry Pi's IP address. Now type your Raspberry Pi's IP address in any web browser to check if the Apache web server is running properly. It should load a default page like the below one.
pi@raspberrypi:/var/www/html $ hostname -I
192.168.0.149
Hypertext Preprocessor (PHP)
PHP is a general-purpose server side scripting language that is used to develop dynamic web applications. To install PHP on your Raspberry Pi, run the following command from the terminal.
pi@raspberrypi:/var/www/html $ sudo apt install php libapache2-mod-php -y
To check if PHP is working properly, do the following
1. Remove the "index.html" file in the directory "/var/www/html" using "rm" command.
pi@raspberrypi:/var/www/html $ sudo rm index.html
2. Create a new PHP file "index.php" in the directory "/var/www/html". Write any simple PHP program and refresh the web page containing the IP address to check if it displays the intended output.
pi@raspberrypi:/var/www/html $ sudo nano index.php
MySQL (MariaDB Server)
MySQL is a fully managed Relational DataBase Management System (RDBMS) based on Structured Query Language. Run the following command to install MariaDB server.
pi@raspberrypi:/var/www/html $ sudo apt install mariadb-server php-mysql -y
pi@raspberrypi:/var/www/html $ sudo service apache2 restart
After successful installation, run the following command from the terminal for setting credentials to MariaDB server. Press "Enter" for "Enter current password for root" option and "Y" to all prompts. Set new password and press enter. Finally you will see the message "Thanks for using MariaDB".
pi@raspberrypi:/var/www/html $ sudo mysql_secure_installation
By default, MySQL runs on "root" user and password initiated during installation. However, it is good practice to create a new user to login. To create new user, run the following command from the terminal.
pi@raspberrypi:/var/www/html $ sudo mysql --user=root --password
> create user raspberry@localhost identified by 'pi';
> grant all privileges on *.* to raspberry@localhost;
> FLUSH PRIVILEGES;
> exit;
The above commands will create a new user "raspberry" and password "pi".
phpMyAdmin
PhpMyAdmin is an open-source administration software tool that handles MySQL and MariaDB servers. Run the following command to install phpMyAdmin on your Raspberry Pi.
pi@raspberrypi:/var/www/html $ sudo apt install phpmyadmin -y
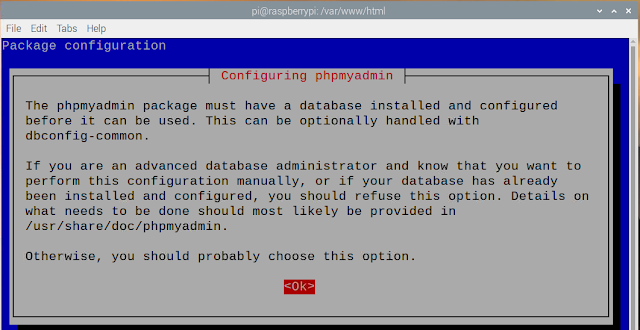
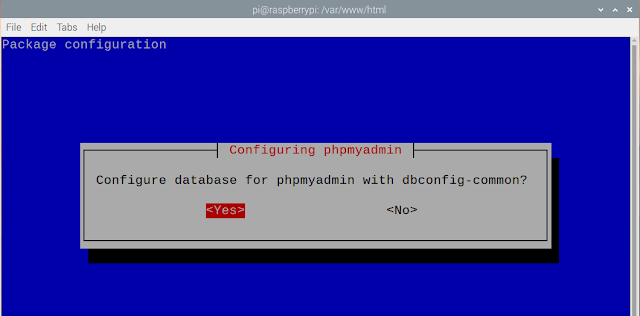
After successful installation, the phpMyAdmin installation program will ask you few questions for configuration.
Click on "Yes" to configure phpMyAdmin with "dbconfig-common".
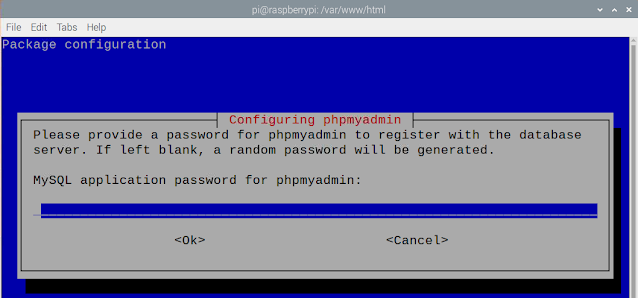
Click on "OK" to use MySQL application password for phpmyadmin.
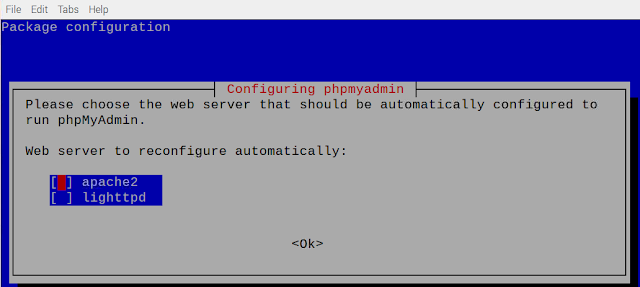
Select "apache2" option and click "OK"
To enable PHP MySQLi extention on your Raspberry Pi, run the following command. Also restart your Apache2 server to update the changes.
pi@raspberrypi:/var/www/html $ sudo phpenmod mysqli
pi@raspberrypi:/var/www/html $ sudo service apache2 restart
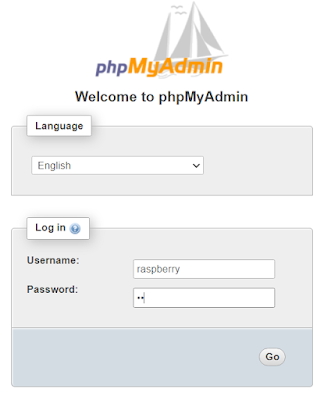
Finally to check if phpMyAdmin works fine, go to any browser and type your Raspbeery Pi IP address followed by "/phpmyadmin". In my case it will be (http://192.168.0.149/phpmyadmin).
This window will show up. Enter your MySQL username and password to login.
Create MySQL Database
The first thing to do is to create a new Database and table in Mariadb server. The database can be created either using commands from terminal or from phpmyadmin page. Here I will show you how to create Database using phpmyadmin page.
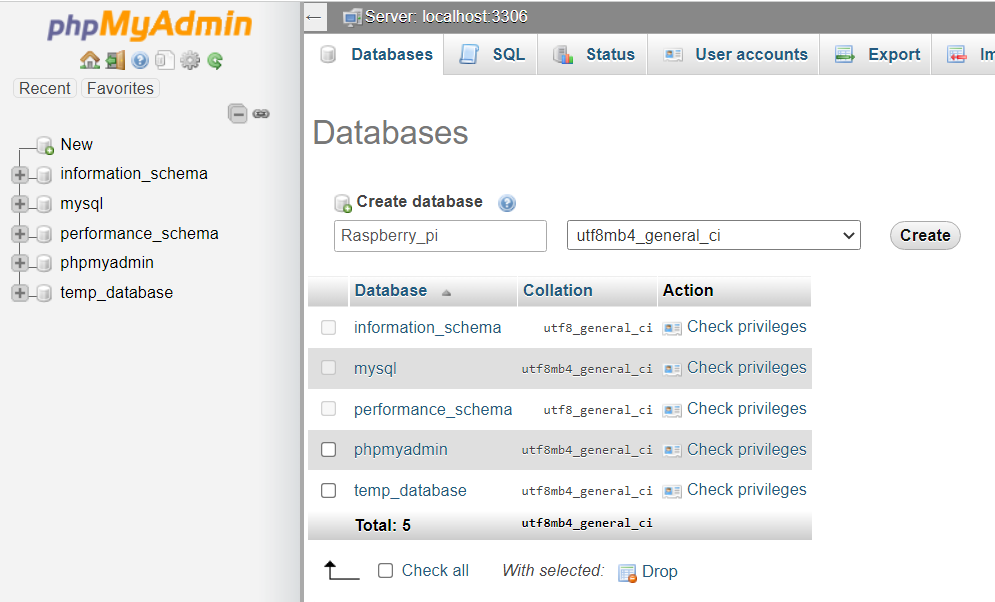
1. Login to phpMyAdmin page using your username and password. The following window will show up.
Click on the "New" option. Now enter your databade name and collation type. My database name is "Raspberry_pi". Click on "create". Create table window will open. Enter your table name and number of columns and click "Go".
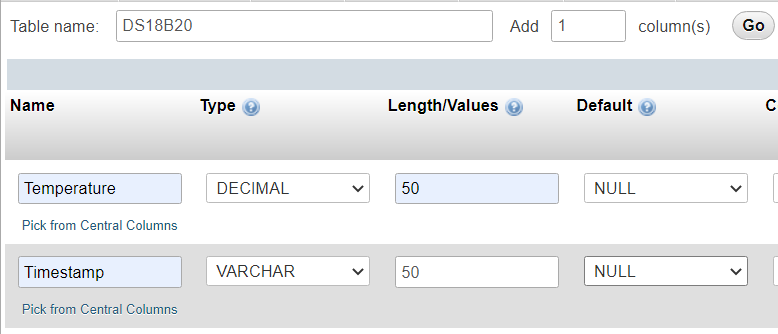
Define structure for your table. I have created a table "DS18B20" with two columns namely "Temperature" and "Timestamp".
Finally, we created a Database and table to store our DS18B20 temperature sensor readings along with timestamps.
Python Code to Store Sensor Readings to a MySQL Database
The coding part consists of two parts. The python code will run on Raspberry Pi to collect sensor readings and the PHP script will run on web server to display the sensor data to the web.
The following Python code demonstrates how to retrieve sensor readings from the DS18B20 temperature sensor and store the results in a MySQL database.
import time
import MySQLdb
from w1thermsensor import W1ThermSensor
sensor = W1ThermSensor()
import datetime
db = MySQLdb.connect(host="localhost",user="raspberry",password="pi", db="Raspberry_pi")
cur = db.cursor()
for x in range(1,500):
temperature = sensor.get_temperature()
print("The temperature is %s celsius" % temperature)
today = datetime.datetime.now()
date_time = today.strftime("%Y-%m-%d, %H:%M:%S")
print("date and time:",date_time)
time.sleep(60)
sql = ("""INSERT INTO DS18B20 (Temperature,Timestamp) VALUES (%s,%s)""",(temperature,date_time))
try:
print ("Writing to database...")
cur.execute(*sql)
db.commit()
print ("Write Complete")
except:
db.rollback()
print ("Failed writing to database")
cur.close()
db.close()
Output
To check the output, run the following commands from the terminal.
1. Login to MySQL server
pi@raspberrypi:/var/www/html $ sudo mysql -u raspberry -p
2. Instruct MySQL to use "Raspberry_pi" database as our current database.
MariaDB [Raspberry_pi]> USE Raspberry_pi;
Database changed
3. Execute "Select * from DS18B20" to display the result.
PHP Script
We here use three PHP scripts that will run on the server. The first file "database.py" defines database connection. The second file "retrieve.php" is responsible to store sensor readings in the database. The final file "index.php" represents the main web page where the final output will be displayed in the form of table. This file inherits data from the first two files and display them in an HTML formatted table.
database.php
<?php
$url='localhost';
$username='raspberry';
$password='pi';
$conn=mysqli_connect($url,$username,$password);
if(!$conn){
die('Could not Connect My Sql:' .mysql_error());
}
$retval = mysqli_select_db($conn, 'Raspberry_pi');
if (!$retval) {
die('Could not select database:' . mysqli_errno($conn));
}
else { echo(" "); }
?>
retrieve.php
<?php
include_once 'database.php';
$result = mysqli_query($conn,"SELECT * FROM DS18B20");
?>
<!DOCTYPE html>
<html>
<head>
<title> Retrive data</title>
<style>
table {
border-collapse: collapse;
font-family: "Lucida Console", "Courier New", monospace;
width: auto;
border: 1px solid black;
}
td, th {
border: 1px solid #dddddd;
text-align: left;
font-weight:bold;
padding: 8px;
}
tr:nth-child(even) {
background-color: white;
}
tr:nth-child(odd) {
background-color: #D6EEEE;
}
</style>
</head>
<body>
<h1 style="color:#c41949;">DS18B20 Temperature Sensor</h1>
<?php
if (mysqli_num_rows($result) > 0) {
?>
<table>
<tr>
<td>Temperature</td>
<td>Timestamp</td>
</tr>
<?php
$i=0;
while($row = mysqli_fetch_array($result)) {
?>
<tr>
<td><?php echo $row["Temperature"]; ?></td>
<td><?php echo $row["Timestamp"]; ?></td>
</tr>
<?php
$i++;
}
?>
</table>
<?php
}
else{ echo "No result found"; }
?>
index.php
<?php
include_once 'retrieve.php';
?>
<html>
<head>
<meta name="viewport" content="width=device-width" />
</head>
<body bgcolor="#edbac8">
</body>
</html>
Output
Run "index.php" from the terminal using the following command.
pi@raspberrypi:/var/www/html $ php index.php
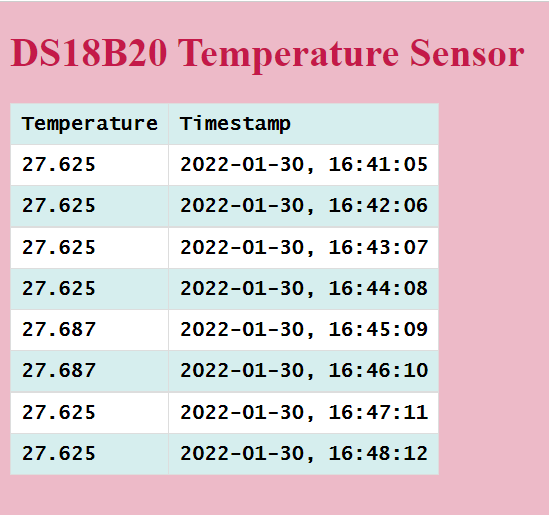
Now go to any web browser and enter your Raspberry Pi IP address to view the final output.





0 Comments